Hiking Your First Winter Peak
With calendar winter quickly approaching, I find it helpful to reflect on what worked for me last snowflake season and what definitely didn’t. Although we might not get as much snow this upcoming season with it being a la niña year here in Colorado, it's always important to consider the essentials when evaluating backcountry winter travel. The following are some of the lessons I learned during my first winter alpine season.
What is a 'Snowflake Peak'?
To clarify, when I call a peak a 'snowflake', I am referring to the time of year I climbed it. Anything climbed during calendar winter qualifies as a Snowflake summit. Although winter conditions do not exclusively exist during calendar winter, it is easier to qualify a climb based on the season it falls in than something more discretionary like a climber's consideration of conditions. Technically, one could experience winter conditions in Colorado in May, but that wouldn't qualify as a snowflake peak because it's past the calendar winter cut-off (which typically falls near the end of March).
As a frequent user of the 14ers.com forum, I understand this term to derive from the ❄️ snowflake emoji your peak list gains when you complete a climb during calendar winter. There are likely other terms used among mountaineers for this accomplishment, but the claim is the same: summitting a peak during some of the roughest possible conditions.
 A screenshot of my peak checklist on 14ers.com. See how the Snowflake appears opposite the standard mark of completion.
Why Climb in the Winter?
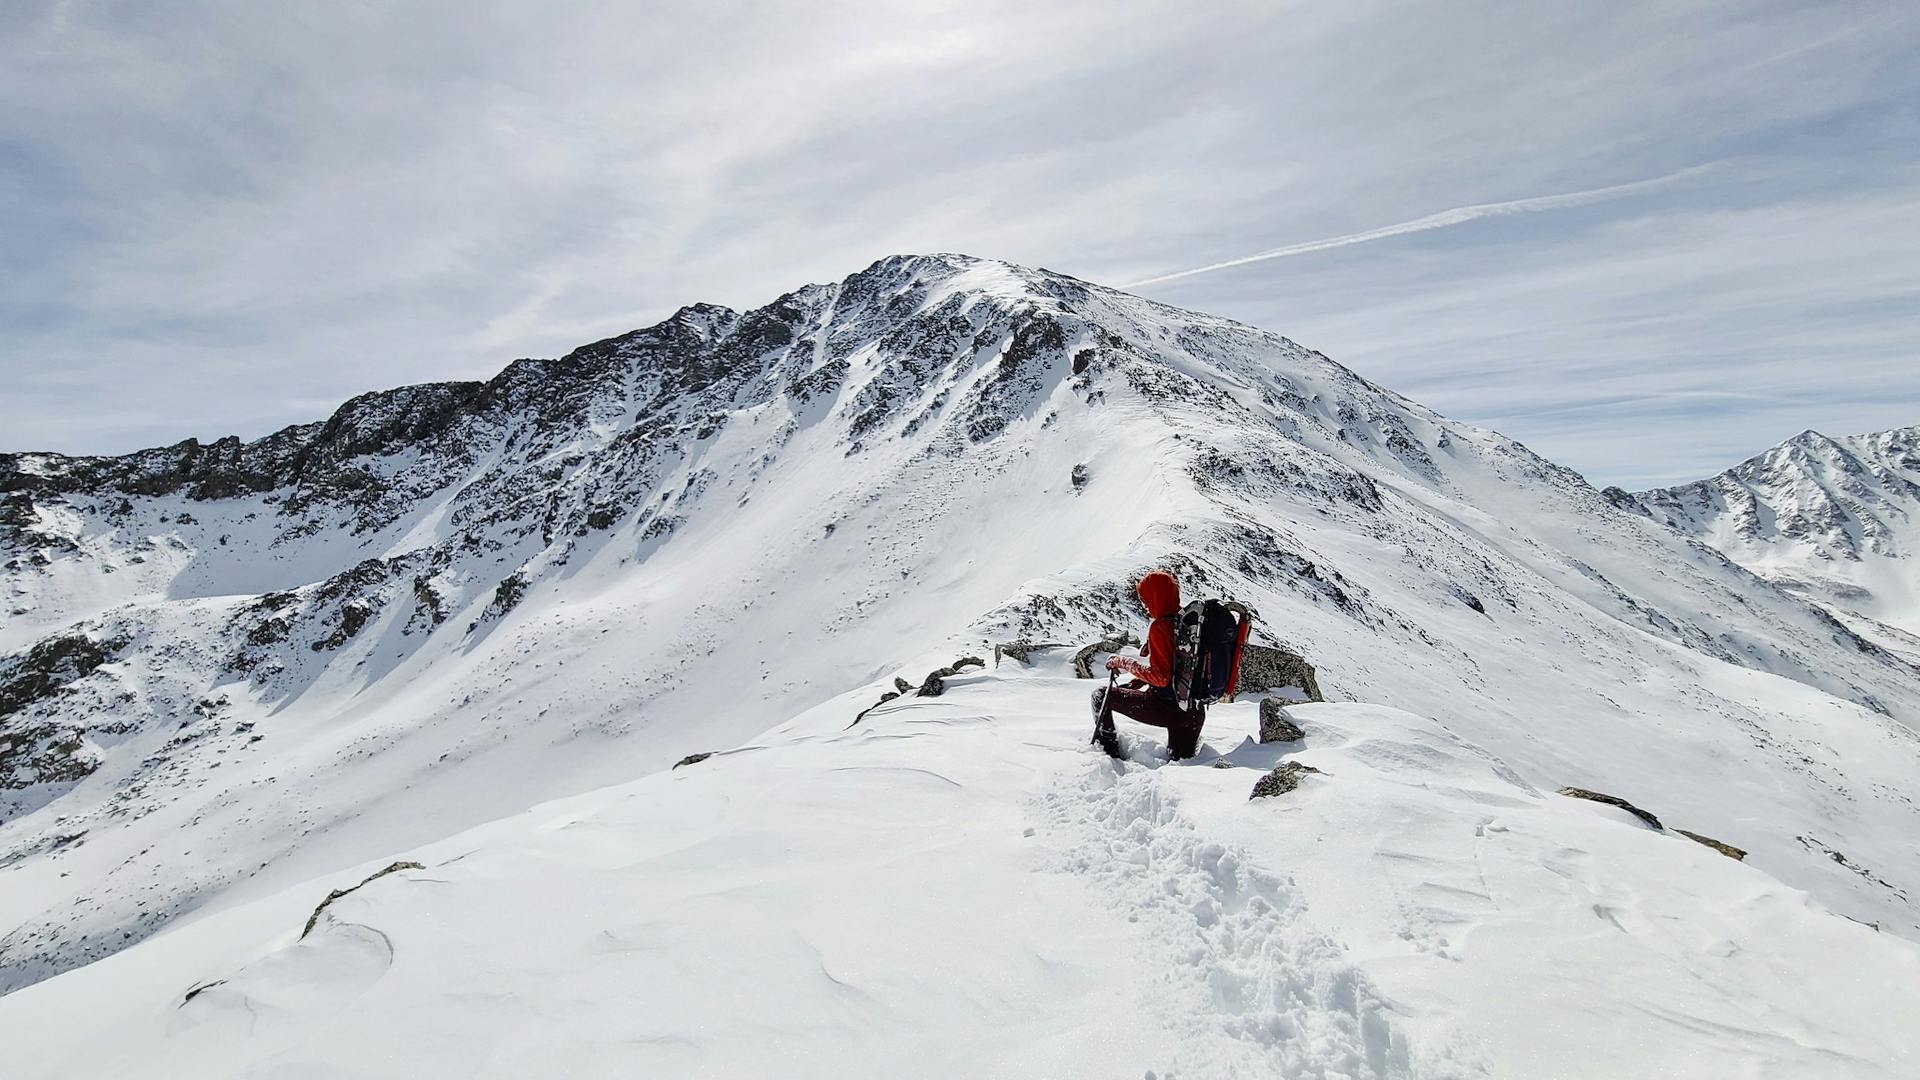 Ascending La Plata in March of 2021. We were post-holing up to our waist at times.
Colorado winters up in the alpine are something special. It’s not easy to convey the serenity one feels when slogging up a snowy hill on a 0℉ winter morning. Or how a sunrise inversion reflecting off of a fresh blanket of snow can stay in your mind for years. Or the accomplishment one feels when summiting a 14,000 foot peak despite icy winds and waist-deep pockets of powder. And if you’re a downhill enthusiast, you’ll find yourself at the top of some of the best ski lines in the world. The payoff for your effort seems tenfold in the winter, and I would argue the peaks look their best wearing a fresh white coat.
Preparing for a Winter Climb
As I’ve mentioned, winter brings some of the deadliest conditions possible to the Colorado high peaks. While it is possible to have an amazing bluebird day in the snowy backcountry, it is crucial you prepare for the worst before you enter any wilderness area this time of year. Recreating in deep snow can quickly become a matter of life and death, and the risk is increased when aggressive slope angles and a notoriously unstable snowpack come into play.
On top of these deadly conditions, the already difficult feat of climbing a mountain is made harder when you have flotation devices strapped to your feet. Your pace and stamina also take a couple of hits when the temperatures start to drop. Expect to arrive at your destination hours later than you might plan to on a summer day, and don't expect the descent to be significantly easier than your ascent. Even with a couple of glissades factored in, afternoon snow is a different beast than early morning pack and you increase your risk of triggering a slide the later in the day you descend.
In addition to gear, training or at least some technical preparation is recommended. Albeit expensive, a Level One AIARE (American Institute for Avalanche Research and Education) Avalanche Rescue Course is highly recommended “for anyone, regardless of method of travel, who wants to recreate in or near avalanche terrain” according to the course creator, the Avalanche Research and Education Center. AIARE 1 prepares you to (1) develop a plan to travel through and (2) identify avalanche terrain, (3) effectively make terrain choices in a group setting, and (4) demonstrate effective companion rescue. If you aren’t sure you’ll enjoy winter hiking and want to save your money before committing to a course, taking the time to research these topics ahead of your first backcountry winter experience is encouraged.
Some free resources you can use to learn more about recreating in avalanche terrain:
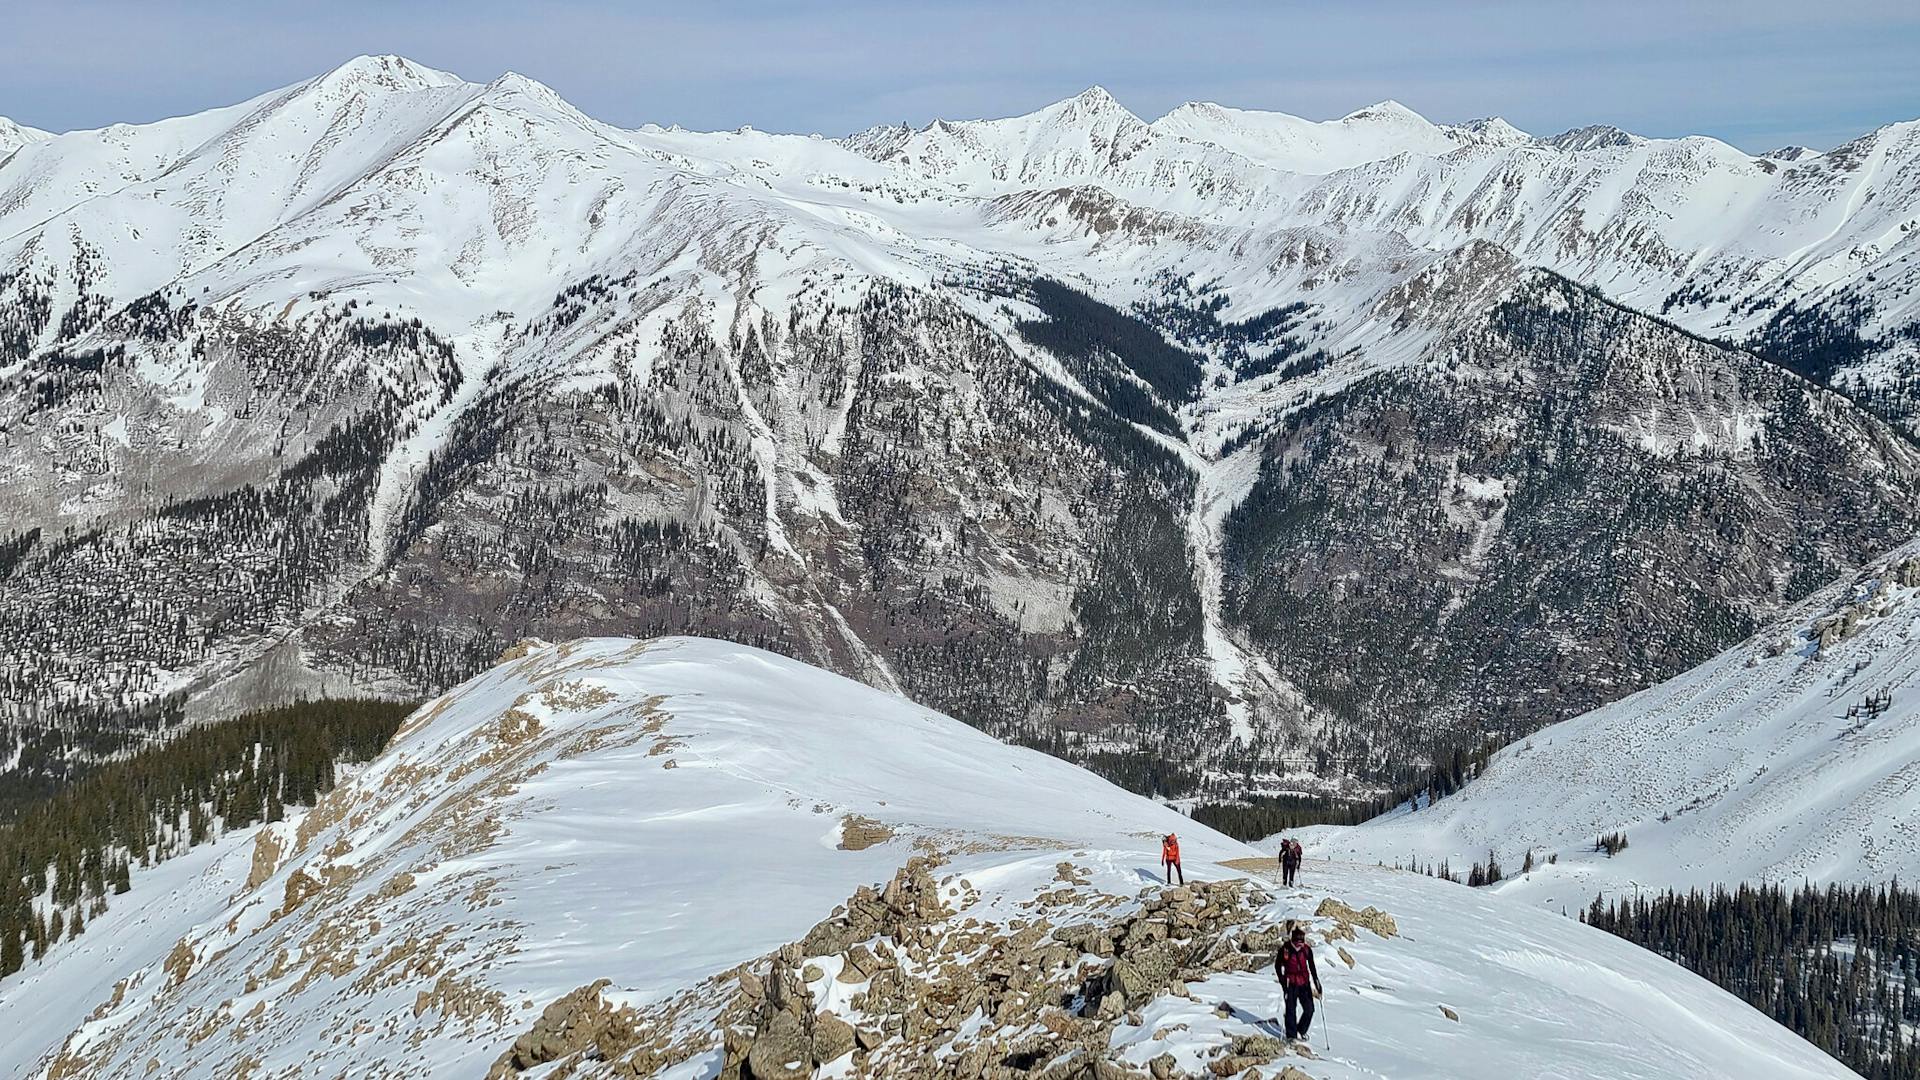 A look back at our group ascending La Plata Peak.
Gear
The Essentials
In addition to the standard safety and shelter items I outline in my post about packing for a 14er, I’ve found the following items to be essential on my successful winter summits:
-
Water bottle (not a bladder). I learned how quickly a straw will freeze on my first winter hike. After trying to drink from the opening of my Camelbak bladder and spilling it all down my coat instead, I have not forgotten to opt for an insulated Nalgene since.
-
Gatorade. I’ll admit, water isn’t always appetizing when I’ve been suffering in cold winds for a few consecutive hours. Gatorade or a similar sugary electrolyte-filled beverage goes a long way up high. One of my climbing partners will tell you nothing tastes better than Glacier Cherry at alpine.
-
A Satellite Communications device. I’ve said that a SatCom is recommended but not necessary to climb a 14er, but I would argue it is necessary for winter travel. You don’t want to be stuck without service or SOS capabilities when the stakes are higher. More robust models with the ability to show your position on a topographic map can also help you avoid avalanche terrain while in the field.
-
Avalanche beacon & probe, for every member of your winter climbing team. Ideally everyone in the group has their own, but it can be nice to own two or more as a solo climber so you can loan one out if someone forgets or doesn’t own one themselves. You don't only have to use probes in an emergency situation, either. It can be helpful to poke at the snow at various points as you're going along to gauge depth and density.
-
A wide variety of snacks. The same rules apply as packing for a regular 14er here, if not more so: pack what you think you’ll eat. I’ve found it’s harder to maintain an appetite in lower temperatures, so making sure you have items you’ll actually want to ingest is crucial in the winter. Also consider what might not keep well in the cooler temps (fruit snacks, for example, can get too hard to chew, but I've found applesauce pouches don't freeze above 0℉).
-
Extra hand warmers, as they don’t last quite as long when the temperatures are that far below freezing. I’ve gotten lucky enough to find boxes of these for sale at Costco at the beginning of the season, which makes it even easier to ensure I’ve got extras in every pack, pocket, and car we own.
-
Snowshoes, preferably ones that aren't difficult to use for extended periods of time. I love my MSR Lightning Ascents because they're lightweight, durable, and they have a heel raiser for those steeper uphills. They pack nicely along the sides of my Osprey Mutant 38L and that has made all the difference- it's a significant upgrade from my winter pack setup prior, which consisted of a Deuter UL daypack and some precariously-placed carabiners.
-
A belay jacket to help keep warm during the in-between moments. Something that packs down very small and has high insulation, ideally this is an outer layer that fits over all of your other layers to insulate you while you're taking a break.
Nice to Haves
-
Backpacking stove & mini propane tank: you can make yourself a warm cup of hot chocolate at the summit, or melt down some snow to refill your water bottle in case of an emergency. It’s handy for at least one member of your group to have a stove on hand for any winter climb.
-
Wool base layers. I was not a believer until I bought my first pair of Smartwool Intraknit tights. Since then, I question why I ever doubted wool’s capabilities. It manages to stay dry & warm even in waist-deep conditions, and I don’t overheat like I did with my synthetic layers (shoutout to all of the fleece I bought only to hate). Smartwool in particular does a great job with their blends.
-
Mittens to go over my glove liners. It’s easy to underestimate that winter cold, especially when you’re working up a sweat on an uphill grind, but the second you expose your hands to the air you’ve started a countdown to frostbite. Getting a pair of waterproof mittens that easily pulls on and off my gloved hand has changed everything for me. And if it gets too warm, I can easily clip them to a carabiner on my pack for storage.
-
A vest is another item I'll admit I didn't believe in until I tried out. On a windless & sunny winter day, a vest is the only outer layer I need to be comfortable at altitude.
-
An ice axe isn't necessary for most class one and two climbs, but it can make descending an icy slope of any grade just a bit safer and easier. You cold use hiking poles to stabilize you for a descent, but an ice axe can be a worthwhile investment as it helps you self-arrest if you lose your footing.
 Ascending Mount Democrat in January of 2021, Mount Cameron in the background.
Finding Winter Routes
Without repeating too much info from the free resources I’ve linked above, there are a few things to consider about each route you're evaluating that will help you identify which routes might be a better option to pursue in the winter.
-
Slope Angle
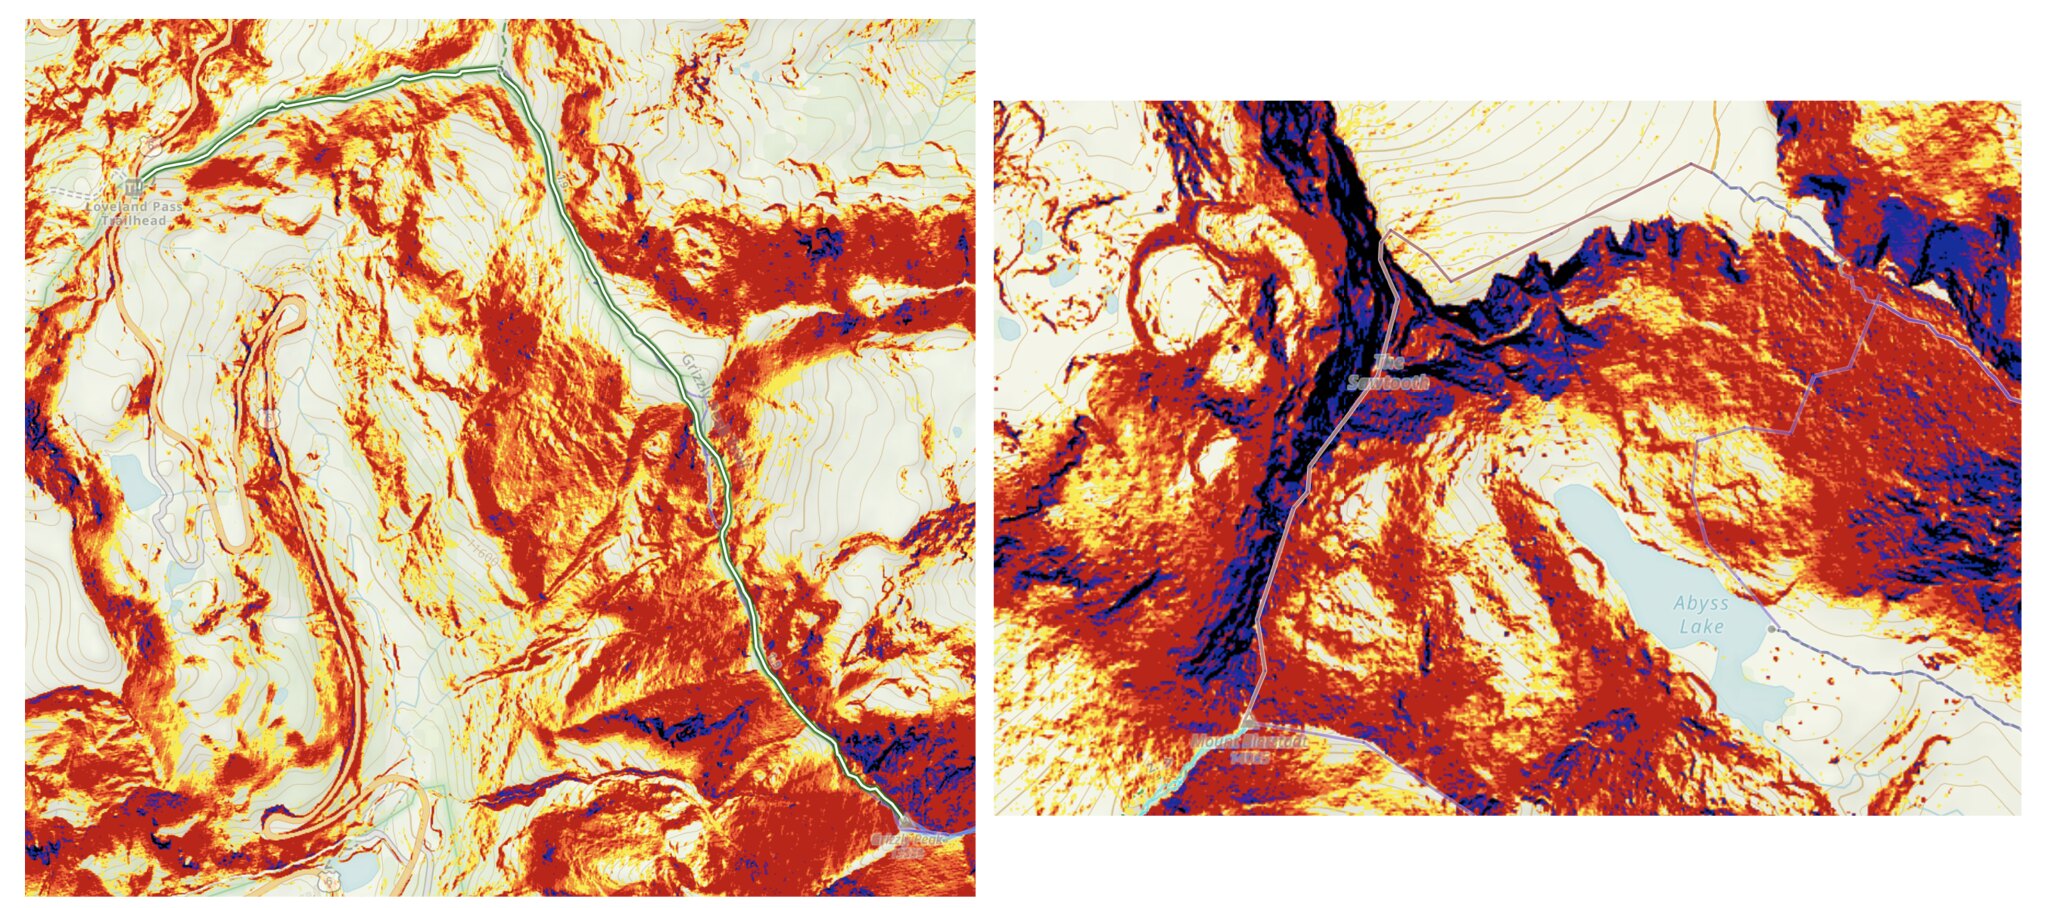
One of the most straightforward ways to assess risk on a winter route is identifying the slope angle you might be traveling under or across. The aspect of the mountain you intend to climb can also impact slide risk (e.g. the north side gets less sun in winter months, causing more snow to stay accumulated a.k.a. slope load), but seeing your line on a topographical map (I like the slope angle filter on gaia’s app) can be a much more clear-cut way to identify risk. For example: can you see why the route on the right in the following image might be riskier?
-
Trailhead Access
In the summer, 4WD roads can bar access to a peak for sedan drivers. In the winter, the angle of the road alone could be your barrier to drivable entry. What might be a moderate 4x4 road during drier months, like Uncompahgre Creek, can become completely impassable with 2’ of snow and ice melt. Websites like climb13ers.com and 14ers.com can glean insight on winter access to a number of popular trailheads, but you might need to dig deeper for lesser traveled areas.
-
Recent Condition Reports
As I’ve mentioned, I frequent the 14ers.com forum, but I probably visit it more in the winter than I do in the summer. Conditions can be fairly stable in the summer and reports that will change your plans are more relevant to trailhead closures or access issues (see: Mount Lindsey or DeCaLiBron access issues from the summer of 2021).
In the winter, conditions are a little more touchy. Reports of avalanche slides or road closures further out than seasons prior can change your whole approach. It's important to find condition reports closer to your planned climb date, or reports from a different year but the same season or conditions you plan to climb in. For example, we couldn't find any recent reports when we climbed La Plata this past March, but we found a report from the March prior that gave us helpful information for our climb a year later.
Recommended Starter Routes
I'm not saying any of these are easy, but there are some winter routes with lower risks that I would recommend for first time snowflake pursuits.
-
Mount Bierstadt's Standard Route
- Guanella Pass does close somewhere between 1.5 and 3 miles below the top of pass during winter months, but it doesn't add that much to your climb all things considered. As far as road walks go, this one is pretty easily done and won't bog down your overall day by much. You also typically have a nice trench to work with as Bierstadt is heavily trafficked on and off season.
- Roundtrip stats: 10 miles & 3,700 feet of gain.
-
Mount Sherman's South Slopes
- Contrasted to the standard ridge approach, the south slopes of Sherman are a little more gradual and easier to navigate than a ridgeline (and its accompanying cornice) in the winter. You start from the same trailhead, Fourmile Creek, which can be impassable as far as 3 miles from the trailhead with snow. Similar to Guanella, though, this road walk isn't as significant as some of the winter closures can be. You pass by some mines on this route and the avalanche risk isn't too bad. The south slopes make for a fun glissade on your way back down, too.
- Roundtrip stats: 8.5 miles & 3,100 feet of gain.
-
Humboldt Peak's East Ridge
- Technically a bushwhack made a little easier with snowpack, this approach to Humboldt Peak is the safer option in winter months as you don't pass under the potentially loaded slopes that the South Colony Lakes road snakes through. If you're lucky enough to find a trench, this snowshoe is a little less of a slog, but without one you'll be breaking trail for 3 or so miles in the trees up the Rainbow Trail before you get above treeline.
- Roundtrip stats: 13 miles & 4,900 feet of gain.
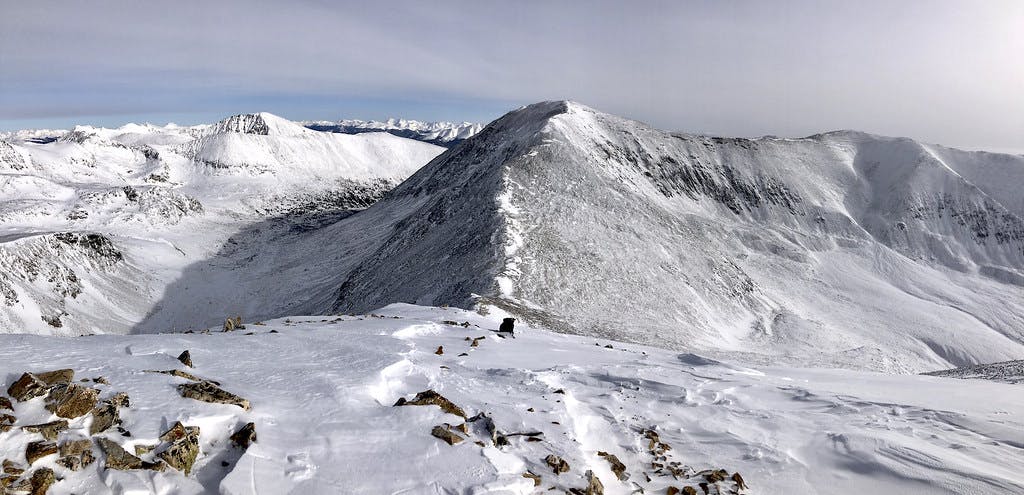
 Just after we gained the headwall of La Plata's standard route, the final false summit barely visible.